
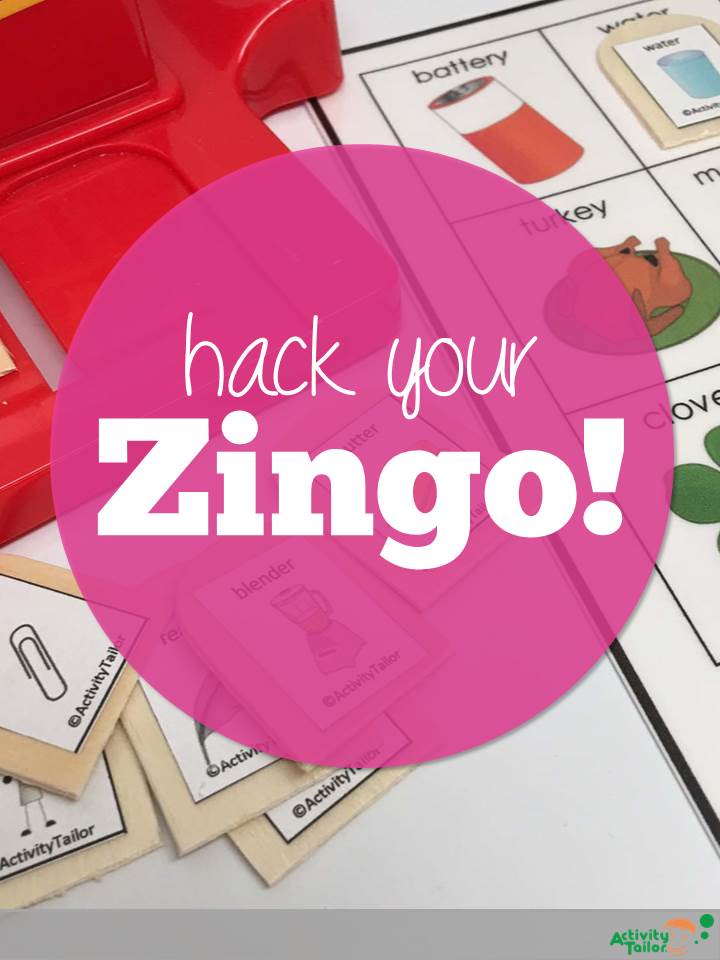
Who loves Zingo!? I do! This was a favorite in my household for years and when it was outgrown it immediately found a place on the shelf in my speech room.
Need to add it to your speech room? You can find it here.
*As an Amazon Associate I earn from qualifying purchases.
I’d used it to work on a number of skills—turn taking, matching, vocab—and often had hand drawn pictures of a girl and a boy on the outside of the slider to address possessive pronouns (her rabbit, his hat), but I really wanted to use it for anything. And after a number of failed attempts at making my own tiles, I DID IT!
Want to see how I hacked Cariboo? Click here.
How to hack your Zingo!
Sooooo easy! I bought the extra wide (1”) craft sticks at Michael’s and cut them to size which gave me two nicely rounded tiles (just like the real ones) and an additional four rectangles (which also work, they’re just a different shape). It is much, much better to err on the side of slightly small. The “machine” doesn’t care, but it’s easily jammed with ones that are slightly too big.
My Michael’s only had a pack of the jumbo craft sticks left and I definitely needed more than that immediately, but then I spied the really short jumbo sticks. These babies don’t even need to be measured! Just eyeball the halfway point and you’re set. The wood is also much easier to cut. It’s a more expensive way to go because the price is about the same for each and you obviously get lots more tiles out of the long sticks, buuuuuut if you can swing the cost it will save you a load of prep time. Plus, you have the added bonus of all your tiles being the “right” shape if you’re in to that sort of thing. A standard pair of adult scissors will cut either.
Craft sticks are very uncooperative to write on. Sharpie bleeds and pen works but the wood grain makes it difficult to write neatly, plus most of my kiddos aren’t readers yet, so I made little stickers. You could stick on color coding dots or other small label if you wanted to draw/write.
I print them out on full size sticker paper, but you could use regular paper and use an adhesive (Again, I’m all about saving time and since I’ll be using these a looooooong time and frequently, it’s worth the investment to me.).
I created matching bingo boards and I’m all set!
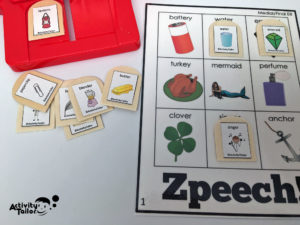
You can see Zpeech for Articulation here and Zpeech for Language here (each includes a template to measure the long craft sticks), and I have early concepts, describing concepts and phonological processes in the works. This would have been great for math facts at my house, but, thankfully those days are long gone.
Play the way you would traditional Zingo! I let my students decide if we are going for three across or full black-out. There are 24 phoneme/position specific tiles for each target so I’m getting lots and lots of trials in!
Who else uses this in therapy? Who’s tempted to hack theirs too?!
Love these kinds of tips and hacks? Join my weekly newsletter! You’ll also receive exclusive freebies, giveaways and early sale info.


This Post Has 3 Comments
I’ll be hacking mine for sure but I’m VERY interested in your phonological one being completed. 🙂
Oh, me too! I have so many kiddos that fall into this category so I’m very motivated! Kim
Cool! Great idea!! Thanks for including the link for the sticks that work with the game 🙂
Comments are closed.